
So finally a bit of free time from 'real life', we took the chance to have a game of Engage and record it for a battle report. Before you get started, i must apologise for the quality of the photos.
Ben and I agreed to a 1000pt game, which sits in at around the large end of a medium sized game and should last about 1-1.5 hours. The notes and write up have been done by Ian who also undertook the role of ourimpartial adjudicator.
We used the Basic fleet list, as found in the rule book to provide us with the basic stats and points for our ships, then used the extended upgrade list, also found in the rule book, to upgrade them with additional weapons.
Click the following link to find out more about Engage: Spaceship Combat.

Ben’s Fleet
Destroyer [200], “BSS Shotgun”
Remove Energy Torpedo
Swap Beams for Drain Beams
Command Crew 1
Light Cruiser [445], “BSS Longbow”
Remove Energy Torpedo for +2 Beam Power
Swap Beams for Lancer Beams
Increase Impulse Engines by +1
Add Stealth System Power 2
Frigate [170], “BSS Alpha”
Add Energy Torpedo
Frigate [170], “BSS Beta”
Add Energy Torpedo
Fleet Total 985pts
The plan
My strategy is arguably a risky one. Using the ‘BSS Shotgun’, I hope to deliver a suicidal sucker punch to Craig’s most threatening ship by crippling its shields. To do this, I plan on moving auxiliary power into my ship’s drain beams (allowing me to roll a whopping 9 damage dice and doubling any damage caused to the target’s shields). Although this early move won’t cause any hull damage (drain beams can only ever damage the shields), I hope to leave the target ship vulnerable to the rest of my fleet.
The BSS Longbow boasts some impressive long ranged firepower thanks to its lancer beams, which should enable it to take full advantage of the BSS Shotgun’s initial manoeuvre from a safe distance. Lancer beams don’t lose power of distance like other beam weapons. There is of course still the matter of hitting so boosting sensor arrays with auxiliary power might be a good move as this makes it easier to hit enemy ships when firing.
The BSS Alpha and BSS Beta make perfect utility ships. Although they possess very few upgrades, the energy torpedoes they possess allow them to lay down some decent firepower and present a reasonable threat that larger ships will not want to ignore. I intend to use them to apply pressure to Craig’s flanks and rear, hopefully drawing some attention away from the BSS Longbow in the process!
Craig’s Fleet
Light Cruiser - "CL Constantinople"
Beam Weapons
Quantum Torpedoes
Ablative Armour
2 Command Points
Light Cruiser - "CL Say My Name"
Beam Weapons
Photon Torpedoes
1 Command Point
Destroyer - "DD Agincourt"
Beam Weapons
Photon Torpedoes
Fleet Total 1010pts
The plan
I have decided to go for a smaller number of ships in my fleet but each has been given several upgrades, hopefully increasing their overall threat level. I plant to use the Agincourt and Constantinople working in tandem, combining their firepower against a single enemy at a time. Whilst this team chips away at the enemy, ‘Say my name’ will work solo to hold the far flank.
The ablative armour I’ve given the Constantinople should help protect it from Ben as I’m certain he’ll want to take it down when he finds out it is packing Quantum Torpedoes. Like Photon Torpedoes, Quantum Torpedoes double the score of any damage dice but have the added advantage of rolling a mighty 4 dice instead of the usual 2. This should allow me to punch through even the toughest shield.
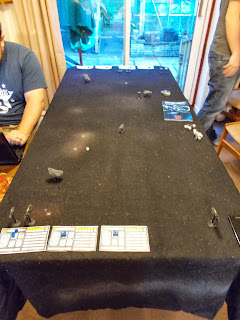
Ben and Craig decided to use the rules for a pitched battle. This type of battle is straight fight with no specific objective other than inflicting damage and protecting your own fleet. The 2 commanders began by placing down some space terrain (basic asteroids) and then alternately deploying their ships. Once the battlefield was ready Ben and Craig rolled for the initiative (the chance to activate a ship of their choice)
Craig won the initiative roll – 6 to 3 (the roll is made at the start of every turn on a d6). Craig elected to activate one of Ben’s ships first: the BSS Longbow. Activating an enemy ship may seem unusual but it can force them to show their hand and make the first move.

Turn 1
With the BSS Longbow now activated, Ben elected to move 2 auxiliary power into the ship’s forward shields. This means that the shield power of the front shield counts as 4 more when the ship is attacked in its front arc (2 for each point of power). After a tentative impulse move, Ben attempted a long shot from a whopping 64” (-5 to hit) against ‘Say My Name’ using lancer beams. Unfortunately, a double 1meant a miss. Having completed the ship’s maximum 3 actions, it passes to Craig to activate one of his own ships.
The Constantinople is Craig’s ship of choice. Like Ben, Craig begins the battle defensively, impulse moving forward, and diverting 2 power to the Constantinople’s forward shields and takes a pot shot at the BSS Longbow. Ben reveals that his ship is running a stealth system which doubles the range of attacks against it for the purpose of rolling to hit. With the range modifiers this would mean Craig would need to roll an 18 on 2 dice, an impossible task, the shot is wasted.
It is again Ben’s chance to activate a ship, he chooses the BSS Alpha and extends his defensive streak, powering up the shields.
The turn continues in much the same with both commanders preparing their ships for combat. The BSS Shotgun however, breaks the mould and warps 3 (36”) towards Craig’s battle line. The Shotgun then shoots its drain beams, targeting ‘Say My Name’. Ben rolls to hit, beating the required 8. The BSS Shotgun’s drain beams were at power 6, meaning Ben rolled a total of 6 dice to determine what if any damage was caused. A single 6 was rolled, causing 2 damage to the shields (drain beams double shield damage). To finish the turn, Ben transferred 3 power into his ship’s main shields.
Turn 2
At the start of turn 2, Ben won the initiative roll and elected to activate the BSS Shotgun again. Having previously moved 3 energy into shields just in case he lost the priority roll, he then moved all 3 into the beam weapons and once again opened fire upon ‘Say My Name’. With a successful hit he then rolled 9 dice for damage (the extra three coming from the auxiliary power) a further 2 points of shield damage was caused. Ben attempted to carry out a ‘fire again’ order and succeeded his command roll. Fortunately for Craig, the shots missed.
It was now the Craig’s chance to act, choosing ‘Say My Name’. With the ship in a vulnerable position, Craig attempted to repair the shield damage. Unfortunately the roll of a 4+ failed. To compound his misery, Craig missed with the ship’s beam weapons. He does however manage to hit the BSS Shotgun with photon torpedoes and causes 2 points of damage to the ship’s hull. Like Ben, Craig attempted a fire again order which he succeeded in passing but missed with his shooting, wasting a command point.
Keeping the BSS Longbow at a safe distance, Ben attempts to deal further damage to ‘Say My Name’ but fails to hit with any weapons.
The Constantinople made an impulse forward, moved 1 energy to sensors and opened fire at the BSS Shotgun, hitting and causing 3 hull damage and a point of damage to the shields.
No further damage is caused this turn, and all ships move into a more advantageous firing position.
Turn 3
With Craig winning the initiative, ‘Say My Name’ successfully repairs 2 shield damage with Craig rolling a lucky a 6. His luck ends there however and both beam weapons and photon torpedoes miss the BSS Shotgun.

The BSS Shotgun, fired its drain beams against ‘Say My Name’, hitting and with Ben rolling 2 6s, causing 4 shield damage. With the total shield damage over the ship’s original shield value, the shields go offline and any auxiliary power is lost. Ben then attempted to repair his ship’s warp engines but failed and so moved 2 power into the ship’s impulse engines, meaning it will be harder to hit.
Craig’s ship, the Constantinople makes an impulse move towards the BSS Shotgun, opening fire with both beams and quantum torpedoes but unfortunately misses both attempts.
‘Say My Name’ is dealt a deathblow when Beta, moves 1 power to sensors and fires with beam weapons. The ship finds it mark, with no shields to beat, any damage caused is doubled, an impressive 8 damage points are scored and the ship is destroyed.
The Agincourt finally gets into the battle and warps into the rear arc of the BSS Shotgun, targeting it with beam weapons and destroying it (targeting a ship in the rear arc makes it easier to hit, adding 2 to the shooting dice). For its final action, the ship fires it’s torpedoes at the BSS Alpha but misses.

With no ships remaining, Ben uses both his remaining ships (Longbow and Alpha), firing upon the Agincourt, shutting down its shields and causing a point of hull damage between them.
Turn 4
Craig once again wins the initiative. The Agincourt, fails to repair its shields but caused a point of shield damage to the BSS Alpha with its beam weapons. In retaliation, the BSS Alpha, impulse moves closer to the Agincourt, and destroys it with its beam weapons.
With only the Constantinople remaining, Craig decides to go after the BSS Longbow, warping 3 towards it but missing with its torpedoes and beams alike. Taking advantage of being able to target the Constantinople’s rear, the BSS Beta fires torpedoes which cause a point of shield damage; a point of hull damage being saved by the ship’s ablative armour. The Beta follows up its success by firing its beam weapons, causing a further point of shield damage and a point of hull damage.

The BSS Longbow misses with its beam weapons and warps away from danger and then makes a docking move to keep its rear out of sight of the Constantinople.
Turn 5 and 6
In the closing stages of the battle, the Constantinople is able to destroy the BSS Alpha with an impressive display of rolling but succumbs to the combined might of the BSS Longbow’s lancer beams and the BSS Beta’s torpedoes. With Craig’s fleet wiped out, Ben is the victor.


Results
Total time: 1hr 15mins
Craig was able to take out 370 points of Ben’s fleet.
Ben took out Craig’s entire fleet; a total of 1010 points.
As a result of this, Ben won a ‘dominating victory’!
If this battle was part of a campaign using the Engage Campaign System, Ben would have earned himself 3 intel and 3 resources points. In future battles, Ben could use these to make flanking manoeuvres and redeploy his ships to give him an edge as well as gain additional points to improve his ships.
Craig's Conclusion
I honestly had no idea of what to expect from Ben's fleet, but i was surprised by the ingenious decision to combine the Shotgun and the Longbow in such a way.
The battle didn't start great for me, with lots of missed shots causing me to ultimately lose CL Say My Name so early on, my battle plan slipped. However my biggest mistake was my fit of rage after I lost the DD Agincourt - jumping the CL Constantinople all the way down the board to take on the BSS Longbow was a terrible idea, compounded by missing all shots at the BSS Longbow and ultimately exposing my rear to BSS Alpha and BSS Beta. At the least, I could have remembered to use my last command point to do a P’Kard manoeuvre so that I still got points for my sensor array when shooting... I might have hit him then.
Really though, I should have played a tactical game for the victory points and used my superior ship to take out Ben’s two smaller frigates before moving on to the Longbow. With her long range weapon the only one she had and my heavy shields coupled with ablative armour, it would have taken a while for me Ben to do me damage whilst I took out his two frigates; Alpha and Beta.
A lesson learned. I think my fleet composition was generally on the right lines, I just let myself down with its execution. Well played Mr Ben!
Ben's Conclusion
Mwahaha! That went medium-suprisingly well, a lot of the time due to Craig's poor dice rolling.
The BSS Shotgun had some success, but I hadn't counted on losing it so quickly - and would've loved to have it around for a few more turns to help soften up Craig's fleet some more.
The BSS Longbow had some great luck with it's Lancer Beams and Stealth System combo, but boy did I find myself wishing for a torpedo weapon when Craig warp moved right in to my face!
Ship of the match for me has to go to BSS Beta, one of my Frigates. He did some serious damage; fighting way above his weight! Once Shotgun had been destroyed I thought I was in trouble but this little ship stepped up to the plate and then some.
The crew of that ship are getting some serious leave time and a few promotions!
All in all I think I got lucky and Craig made a few decisions that worked out well for me in the long run. A great game and I can't wait to play him again!
Again, for more info, follow this link, to go to our website, or this link, for our wargame vault page.
Ben and I agreed to a 1000pt game, which sits in at around the large end of a medium sized game and should last about 1-1.5 hours. The notes and write up have been done by Ian who also undertook the role of our
We used the Basic fleet list, as found in the rule book to provide us with the basic stats and points for our ships, then used the extended upgrade list, also found in the rule book, to upgrade them with additional weapons.
Click the following link to find out more about Engage: Spaceship Combat.

The Fleets
Destroyer [200], “BSS Shotgun”
Remove Energy Torpedo
Swap Beams for Drain Beams
Command Crew 1
Light Cruiser [445], “BSS Longbow”
Remove Energy Torpedo for +2 Beam Power
Swap Beams for Lancer Beams
Increase Impulse Engines by +1
Add Stealth System Power 2
Frigate [170], “BSS Alpha”
Add Energy Torpedo
Frigate [170], “BSS Beta”
Add Energy Torpedo
Fleet Total 985pts
The plan
My strategy is arguably a risky one. Using the ‘BSS Shotgun’, I hope to deliver a suicidal sucker punch to Craig’s most threatening ship by crippling its shields. To do this, I plan on moving auxiliary power into my ship’s drain beams (allowing me to roll a whopping 9 damage dice and doubling any damage caused to the target’s shields). Although this early move won’t cause any hull damage (drain beams can only ever damage the shields), I hope to leave the target ship vulnerable to the rest of my fleet.
The BSS Longbow boasts some impressive long ranged firepower thanks to its lancer beams, which should enable it to take full advantage of the BSS Shotgun’s initial manoeuvre from a safe distance. Lancer beams don’t lose power of distance like other beam weapons. There is of course still the matter of hitting so boosting sensor arrays with auxiliary power might be a good move as this makes it easier to hit enemy ships when firing.
The BSS Alpha and BSS Beta make perfect utility ships. Although they possess very few upgrades, the energy torpedoes they possess allow them to lay down some decent firepower and present a reasonable threat that larger ships will not want to ignore. I intend to use them to apply pressure to Craig’s flanks and rear, hopefully drawing some attention away from the BSS Longbow in the process!
Craig’s Fleet
Light Cruiser - "CL Constantinople"
Beam Weapons
Quantum Torpedoes
Ablative Armour
2 Command Points
Light Cruiser - "CL Say My Name"
Beam Weapons
Photon Torpedoes
1 Command Point
Destroyer - "DD Agincourt"
Beam Weapons
Photon Torpedoes
Fleet Total 1010pts
The plan
I have decided to go for a smaller number of ships in my fleet but each has been given several upgrades, hopefully increasing their overall threat level. I plant to use the Agincourt and Constantinople working in tandem, combining their firepower against a single enemy at a time. Whilst this team chips away at the enemy, ‘Say my name’ will work solo to hold the far flank.
The ablative armour I’ve given the Constantinople should help protect it from Ben as I’m certain he’ll want to take it down when he finds out it is packing Quantum Torpedoes. Like Photon Torpedoes, Quantum Torpedoes double the score of any damage dice but have the added advantage of rolling a mighty 4 dice instead of the usual 2. This should allow me to punch through even the toughest shield.
The battle
Craig won the initiative roll – 6 to 3 (the roll is made at the start of every turn on a d6). Craig elected to activate one of Ben’s ships first: the BSS Longbow. Activating an enemy ship may seem unusual but it can force them to show their hand and make the first move.

Turn 1
With the BSS Longbow now activated, Ben elected to move 2 auxiliary power into the ship’s forward shields. This means that the shield power of the front shield counts as 4 more when the ship is attacked in its front arc (2 for each point of power). After a tentative impulse move, Ben attempted a long shot from a whopping 64” (-5 to hit) against ‘Say My Name’ using lancer beams. Unfortunately, a double 1meant a miss. Having completed the ship’s maximum 3 actions, it passes to Craig to activate one of his own ships.
The Constantinople is Craig’s ship of choice. Like Ben, Craig begins the battle defensively, impulse moving forward, and diverting 2 power to the Constantinople’s forward shields and takes a pot shot at the BSS Longbow. Ben reveals that his ship is running a stealth system which doubles the range of attacks against it for the purpose of rolling to hit. With the range modifiers this would mean Craig would need to roll an 18 on 2 dice, an impossible task, the shot is wasted.
It is again Ben’s chance to activate a ship, he chooses the BSS Alpha and extends his defensive streak, powering up the shields.
The turn continues in much the same with both commanders preparing their ships for combat. The BSS Shotgun however, breaks the mould and warps 3 (36”) towards Craig’s battle line. The Shotgun then shoots its drain beams, targeting ‘Say My Name’. Ben rolls to hit, beating the required 8. The BSS Shotgun’s drain beams were at power 6, meaning Ben rolled a total of 6 dice to determine what if any damage was caused. A single 6 was rolled, causing 2 damage to the shields (drain beams double shield damage). To finish the turn, Ben transferred 3 power into his ship’s main shields.

Turn 2
At the start of turn 2, Ben won the initiative roll and elected to activate the BSS Shotgun again. Having previously moved 3 energy into shields just in case he lost the priority roll, he then moved all 3 into the beam weapons and once again opened fire upon ‘Say My Name’. With a successful hit he then rolled 9 dice for damage (the extra three coming from the auxiliary power) a further 2 points of shield damage was caused. Ben attempted to carry out a ‘fire again’ order and succeeded his command roll. Fortunately for Craig, the shots missed.
It was now the Craig’s chance to act, choosing ‘Say My Name’. With the ship in a vulnerable position, Craig attempted to repair the shield damage. Unfortunately the roll of a 4+ failed. To compound his misery, Craig missed with the ship’s beam weapons. He does however manage to hit the BSS Shotgun with photon torpedoes and causes 2 points of damage to the ship’s hull. Like Ben, Craig attempted a fire again order which he succeeded in passing but missed with his shooting, wasting a command point.
Keeping the BSS Longbow at a safe distance, Ben attempts to deal further damage to ‘Say My Name’ but fails to hit with any weapons.
The Constantinople made an impulse forward, moved 1 energy to sensors and opened fire at the BSS Shotgun, hitting and causing 3 hull damage and a point of damage to the shields.
No further damage is caused this turn, and all ships move into a more advantageous firing position.
Turn 3
With Craig winning the initiative, ‘Say My Name’ successfully repairs 2 shield damage with Craig rolling a lucky a 6. His luck ends there however and both beam weapons and photon torpedoes miss the BSS Shotgun.

The BSS Shotgun, fired its drain beams against ‘Say My Name’, hitting and with Ben rolling 2 6s, causing 4 shield damage. With the total shield damage over the ship’s original shield value, the shields go offline and any auxiliary power is lost. Ben then attempted to repair his ship’s warp engines but failed and so moved 2 power into the ship’s impulse engines, meaning it will be harder to hit.
Craig’s ship, the Constantinople makes an impulse move towards the BSS Shotgun, opening fire with both beams and quantum torpedoes but unfortunately misses both attempts.
‘Say My Name’ is dealt a deathblow when Beta, moves 1 power to sensors and fires with beam weapons. The ship finds it mark, with no shields to beat, any damage caused is doubled, an impressive 8 damage points are scored and the ship is destroyed.
The Agincourt finally gets into the battle and warps into the rear arc of the BSS Shotgun, targeting it with beam weapons and destroying it (targeting a ship in the rear arc makes it easier to hit, adding 2 to the shooting dice). For its final action, the ship fires it’s torpedoes at the BSS Alpha but misses.

With no ships remaining, Ben uses both his remaining ships (Longbow and Alpha), firing upon the Agincourt, shutting down its shields and causing a point of hull damage between them.
Turn 4
Craig once again wins the initiative. The Agincourt, fails to repair its shields but caused a point of shield damage to the BSS Alpha with its beam weapons. In retaliation, the BSS Alpha, impulse moves closer to the Agincourt, and destroys it with its beam weapons.
With only the Constantinople remaining, Craig decides to go after the BSS Longbow, warping 3 towards it but missing with its torpedoes and beams alike. Taking advantage of being able to target the Constantinople’s rear, the BSS Beta fires torpedoes which cause a point of shield damage; a point of hull damage being saved by the ship’s ablative armour. The Beta follows up its success by firing its beam weapons, causing a further point of shield damage and a point of hull damage.

The BSS Longbow misses with its beam weapons and warps away from danger and then makes a docking move to keep its rear out of sight of the Constantinople.
Turn 5 and 6
In the closing stages of the battle, the Constantinople is able to destroy the BSS Alpha with an impressive display of rolling but succumbs to the combined might of the BSS Longbow’s lancer beams and the BSS Beta’s torpedoes. With Craig’s fleet wiped out, Ben is the victor.


Results
Total time: 1hr 15mins
Craig was able to take out 370 points of Ben’s fleet.
Ben took out Craig’s entire fleet; a total of 1010 points.
As a result of this, Ben won a ‘dominating victory’!
If this battle was part of a campaign using the Engage Campaign System, Ben would have earned himself 3 intel and 3 resources points. In future battles, Ben could use these to make flanking manoeuvres and redeploy his ships to give him an edge as well as gain additional points to improve his ships.
Craig's Conclusion
I honestly had no idea of what to expect from Ben's fleet, but i was surprised by the ingenious decision to combine the Shotgun and the Longbow in such a way.
The battle didn't start great for me, with lots of missed shots causing me to ultimately lose CL Say My Name so early on, my battle plan slipped. However my biggest mistake was my fit of rage after I lost the DD Agincourt - jumping the CL Constantinople all the way down the board to take on the BSS Longbow was a terrible idea, compounded by missing all shots at the BSS Longbow and ultimately exposing my rear to BSS Alpha and BSS Beta. At the least, I could have remembered to use my last command point to do a P’Kard manoeuvre so that I still got points for my sensor array when shooting... I might have hit him then.
Really though, I should have played a tactical game for the victory points and used my superior ship to take out Ben’s two smaller frigates before moving on to the Longbow. With her long range weapon the only one she had and my heavy shields coupled with ablative armour, it would have taken a while for me Ben to do me damage whilst I took out his two frigates; Alpha and Beta.
A lesson learned. I think my fleet composition was generally on the right lines, I just let myself down with its execution. Well played Mr Ben!
Ben's Conclusion
Mwahaha! That went medium-suprisingly well, a lot of the time due to Craig's poor dice rolling.
The BSS Shotgun had some success, but I hadn't counted on losing it so quickly - and would've loved to have it around for a few more turns to help soften up Craig's fleet some more.
The BSS Longbow had some great luck with it's Lancer Beams and Stealth System combo, but boy did I find myself wishing for a torpedo weapon when Craig warp moved right in to my face!
Ship of the match for me has to go to BSS Beta, one of my Frigates. He did some serious damage; fighting way above his weight! Once Shotgun had been destroyed I thought I was in trouble but this little ship stepped up to the plate and then some.
The crew of that ship are getting some serious leave time and a few promotions!
All in all I think I got lucky and Craig made a few decisions that worked out well for me in the long run. A great game and I can't wait to play him again!
Again, for more info, follow this link, to go to our website, or this link, for our wargame vault page.
No comments:
Post a Comment